
Last Updated: October 23, 2026
Quick Summary
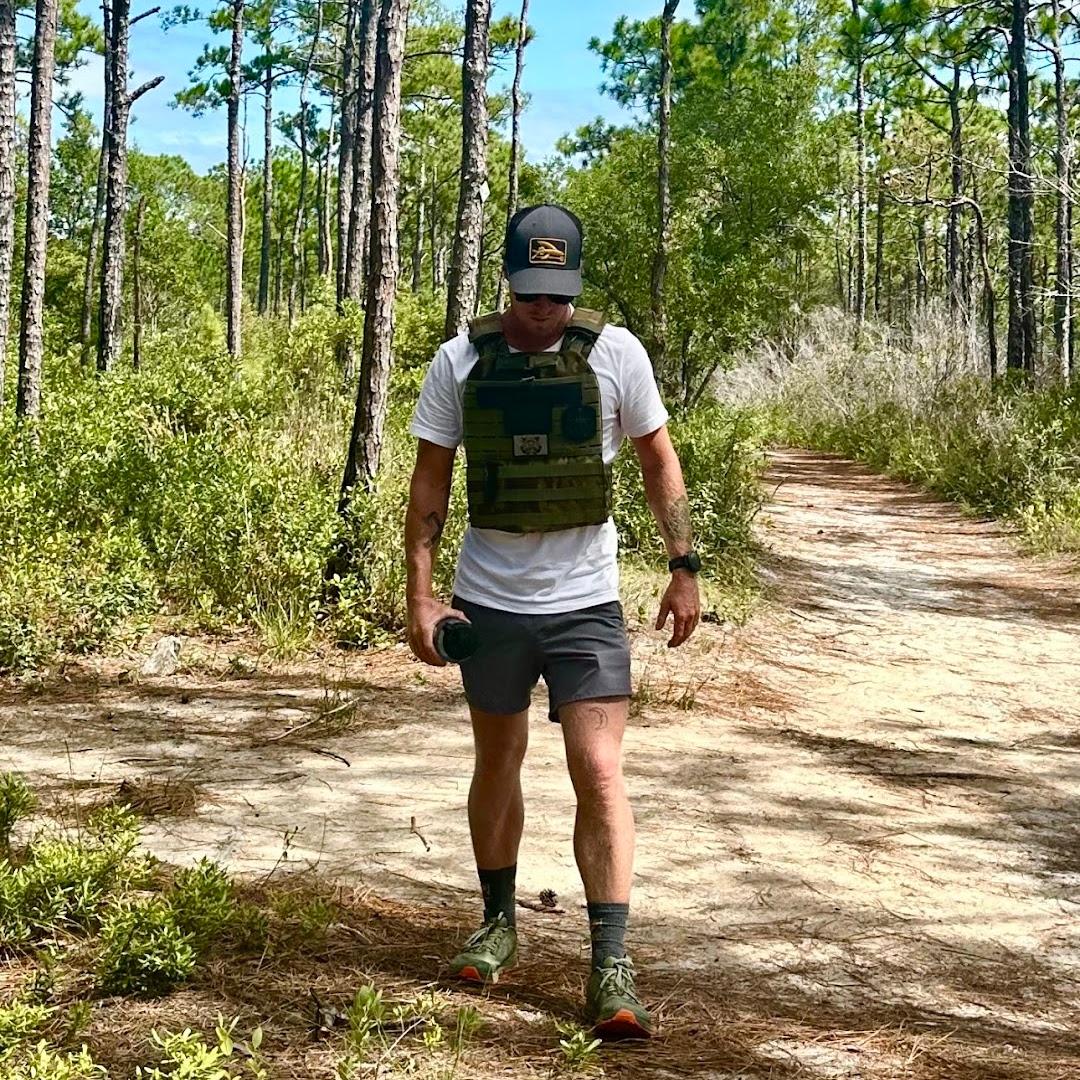
To start rucking for fitness, load a pack and walk for 20 to 30 minutes at an easy, conversational pace two to three times per week, beginning with a light load or no load at all. Add distance first, then small load increases of no more than 10% per week.
- Start at 10% of body weight or less, and add no more than 10% per week.
- Weeks 1-2: walk 20 to 30 minutes, two to three times per week, on flat terrain.
- Set the waist belt first so the pack carries weight on your hips, not your shoulders.
- Keep plates flat against your back, with the heaviest item highest and centered.
- Deload every fourth week by dropping load roughly a third and keeping duration the same.
Table of Contents
- Why Rucking Is the Fitness Habit You Can Actually Keep
- Your Beginner Rucking Plan: Week-by-Week Progression
- How Much Weight to Ruck With (And How to Add More)
- Rucking Gear for Beginners: What You Actually Need
- How to Prevent Blisters While Rucking
- Form, Pace, and Recovery: The Details That Keep You Going
- Common Mistakes That Derail Beginners
- Frequently Asked Questions
Why Rucking Is the Fitness Habit You Can Actually Keep
Rucking is walking with weight on your back, and it fits into a normal life without a gym membership or schedule overhaul.
That low barrier matters. The Cleveland Clinic recommends easing into rucking rather than attacking it, a point their specialists make directly in their guide to adding rucking to your workouts.
At Directional Force, we build gear for people who train hard and refuse to quit.
Below: a week-by-week beginner rucking plan, how much weight to carry, what gear you actually need, and the mistakes that end most rucking streaks early.
Your Beginner Rucking Plan: Week-by-Week Progression
A beginner rucking plan works best when it changes one variable at a time. Add distance first, then load. Doing both at once is how people end up sore, discouraged, and back on the couch.
Weeks 1-2: Establish the Habit
Start with a light load and walk for 20 to 30 minutes at an easy pace, which is the beginner guidance from Wild Gym. Two to three sessions per week is plenty.
Your only goal in these first two weeks is showing up. Keep the weight modest, the pace conversational, and finish each walk feeling like you could do more.
- Two to three walks per week
- 20 to 30 minutes per session
- Light load, or no load at all for the first few walks
Weeks 3-4: Add Distance and Load
Now add distance before weight. Push sessions toward 30 to 45 minutes on the same terrain, then introduce small load increases.
A reasonable target by the end of week four is one to three miles at a steady pace. Ruck Authority's 2026 trend guidance suggests 10 to 15 pounds for one to two miles, two to three times weekly, with weight increases capped at about 10% per week.
Here is the progression at a glance, changing one variable at a time.
Phase |
What to do |
Time or frequency |
|---|---|---|
Weeks 1-2 |
Light load or no load, easy conversational pace, flat terrain |
20 to 30 minutes, two to three times per week |
Weeks 3-4 |
Add distance first, then small load increases |
30 to 45 minutes; one to three miles by week four |
Weeks 5-6 |
Hold the new load steady, add one longer session |
One longer session per week |
Week 7 |
Deload: drop load by roughly a third, keep duration |
Same duration as previous weeks |
Weeks 8+ |
Resume adding load or distance, one variable at a time |
Deload every fourth week |
How Much Weight to Ruck With (And How to Add More)
Most beginners should start at 10% of body weight or less, then add no more than 10% per week. A 180-pound person starts around 18 pounds.
That 10% rule is a ceiling, not a target.
Load options, ranked by how easy they are to progress:
- Textbooks or water bottles: free, adjustable, and fine for weeks one and two
- Weight vest plates: the easiest way to add load in clean increments
- Ruck pack with plates: best for longer distances and uneven terrain
If you are ready to load a vest properly, browse our weight vest plates or step up to the Centurion Weight Vest Gen2 Delta Blackout to hold them.
Rucking Gear for Beginners: What You Actually Need
You need three things to start rucking: a pack that fits, weight you can secure, and shoes you can walk miles in. Everything else is optional. What separates a pack that works from one that wrecks your shoulders is not price, it is fit and load placement.
Fit the pack before you load it
Put the pack on empty and adjust in this order:
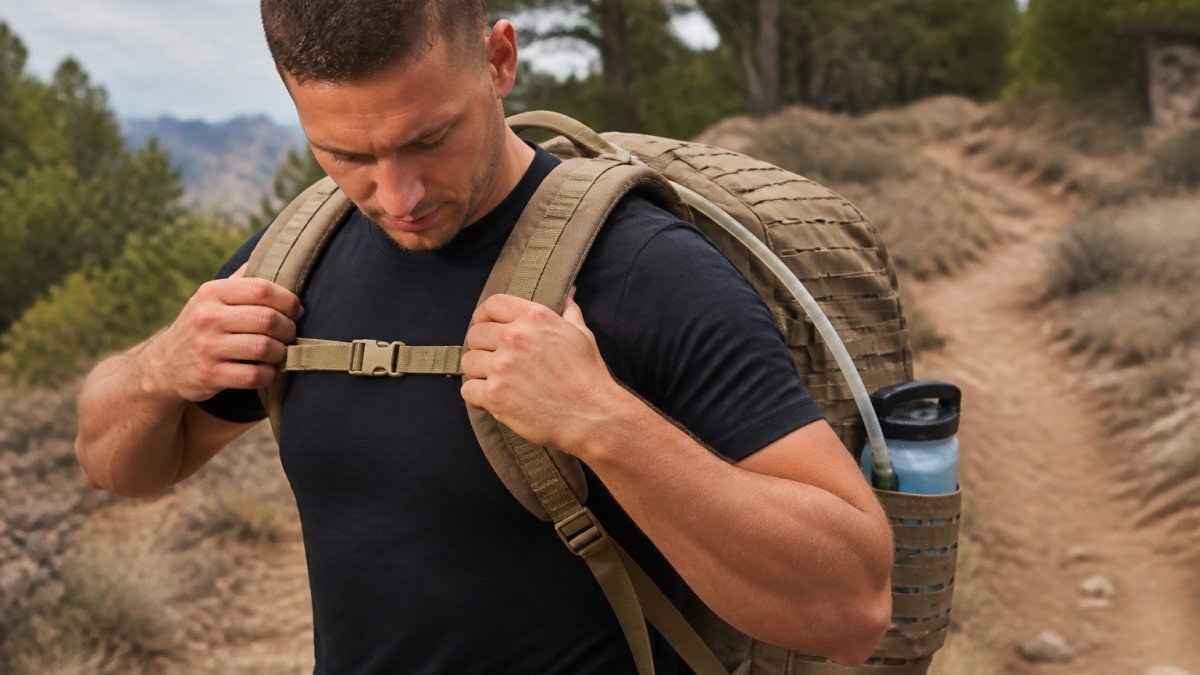
- Loosen everything first. Shoulder straps, sternum strap, and waist belt should all be slack before you start.
- Set the waist belt first. A proper ruck carries most of its weight on your hips, not your shoulders. The belt should sit on the top of your hip bones, not your waist, and tighten until it stays put when you bounce on your toes.
- Then tighten the shoulder straps. They should hold the pack against your upper back without pulling your shoulders forward. If the straps dig into your collarbone, the pack is sitting too low or the belt is too loose.
- Clip the sternum strap last. It keeps the shoulder straps from sliding outward. Snug, not tight, you should be able to slide a flat hand under it.
Quick fit test: walk a few steps and lean forward slightly. The pack should move with your torso, not swing away from your back. If it sways side to side, the belt or sternum strap is too loose.
Place the load high and close
The biggest equipment mistake beginners make is letting weight sit low and away from the body. Load placed high and close to the spine moves with your center of mass; load placed low or loose pulls you backward and forces your lower back to fight it every mile.
- Keep plates flat against your back, in the pocket closest to your spine, not in an outer pouch.
- Put the heaviest item highest and centered between your shoulder blades.
- Pack soft items around the weight so it cannot shift when you change pace.
Watch for pressure points
Pressure points show up as hot spots under the shoulder straps, across the top of the hips, or along the lower back where the pack meets your spine.
Our Overwatch Ruck Pack - 45L is built for exactly this: a padded back pocket for American-made steel plates, padded shoulder and waist straps, and a design that converts to a daily carry once the plates come out. Women looking for a fitted option can check the Domina Womens Weight Vest.

What you do not need on day one: a GPS watch, compression sleeves, or a second pack. Buy the pack, fit it properly, walk, and add gear when a real need shows up.
How to Prevent Blisters While Rucking
Blisters come from three things: moisture, friction, and shoes that do not fit. Fix those and most beginner foot problems disappear.
- Wear moisture-wicking socks, never cotton
- Break in your footwear on short walks before long ones
- Keep toenails trimmed and laces snug but not tight
Footwear is the biggest lever. A trail running shoe works for road rucking, but a purpose-built option handles load and distance better. The MudGear Speed Ruck Boots combine a butyl-rubber outsole with a full-length rock plate, built for moving heavy loads further.

Form, Pace, and Recovery: The Details That Keep You Going
Good rucking form is simple: eyes forward, shoulders relaxed, core engaged, and a conversational pace. What separates beginners who keep rucking from those who quit is not form, it is how they progress load and distance, and whether they know when to back off.
Pace targets by goal
A 15 to 20 minute mile is a solid working pace for most beginners; a 20-minute mile is a reasonable start if you are carrying load for the first time. For general fitness, hold a conversational pace and let pace improve as a side effect of consistency. For a specific event or selection standard, work toward the faster end of that range only after four to six weeks of consistent loaded walking.
A simple progression rule
Change one variable at a time, and hold each change for at least two weeks. A pattern that works for most beginners:
- Weeks 1-2: walk 20-30 minutes, two to three times per week, light load or no load.
- Weeks 3-4: extend to 30-45 minutes on the same terrain, then add small load increases.
- Weeks 5-6: hold the new load steady and add one longer session per week.
Recovery rules that matter
Rucking is load-bearing work, so treat it like training:
- Leave at least one full rest day between sessions early on.
- Stretch calves and hip flexors after every walk.
- Sleep and eat enough, especially in the first month.
Stop signals to respect
Discomfort is normal. Sharp pain is information. Reduce load or stop if you notice:
- Sharp joint pain in the knee, hip, or lower back
- Numbness or tingling in your feet
- A heartbeat that will not settle after you stop
If any appear, back off one variable, load first, then distance, and repeat the previous week before progressing.
Outside Online's writer spent 30 days rucking and reported the takeaways, and the honest theme was adaptation, not instant transformation.
Common Mistakes That Derail Beginners
The mistakes that end rucking streaks are predictable. The ones we see most:
- Starting too heavy. The 10% rule exists because beginners overestimate what their joints can absorb.
- Skipping the waist belt. Load on your shoulders alone is a fast track to neck and back pain.
- Wearing the wrong shoes. Running shoes with no rock plate will punish you on loaded miles.
- Adding weight and distance in the same week. Change one thing, hold the rest steady.
- Ignoring hydration. A loaded walk in heat drains you faster than an unloaded one.
- Training through pain. Discomfort is normal. Sharp pain is information.
Frequently Asked Questions
How much weight should a beginner carry when rucking?
Start with 10% of your body weight or 10 to 15 pounds, whichever feels lighter. Ruck Authority recommends 10 to 15 pounds for 1 to 2 miles, 2 to 3 times weekly, with weight increases of no more than 10% per week. If you weigh 180 pounds, that means beginning around 18 pounds and adding roughly 2 pounds weekly. Keep the load light enough that you can hold a conversation while walking.
How often should beginners go rucking?
Begin with one to two workouts per week, then build to two to three sessions. Wild Gym recommends starting with a light load and walking for 20 to 30 minutes at an easy pace. Give yourself at least one rest day between rucks so your feet, shoulders, and joints adapt. Dr. Kampert at Cleveland Clinic advises easing into rucking rather than jumping into heavy loads or long distances.
How do you prevent blisters and soreness while rucking?
Wear moisture-wicking socks, keep your pack straps snug so the load does not shift, and break in your footwear before long rucks. Stop and address hot spots immediately rather than pushing through them. Build distance gradually, since most soreness comes from adding miles or weight faster than your feet and shoulders can adapt. Hydrate well and stretch your calves and hips after each session.
What should you wear and bring on a ruck?
Wear moisture-wicking clothing and supportive shoes or ruck-specific footwear with good grip. Bring water, a phone, and a light layer for weather changes. A hydration bladder keeps your hands free and your pack balanced. Keep the load secure in a padded plate pocket or wrap weights in a towel so they do not shift against your back during the walk.
